A door or window can look simple in a showroom and become unforgiving on site. A frame that is slightly out of square may cause sticking, drafts, or uneven gaps. The details matter.
The U.S. Department of Energy estimates that heat gain and heat loss through windows account for about 25% to 30% of residential heating and cooling energy use. That figure makes installation quality more than a cosmetic concern. Yet it does not mean every replacement will deliver the same savings; climate, product choice, and existing construction all affect results. Measure twice. Check the opening, sill, and surrounding structure before ordering or fitting anything.
These seven practical tips focus on the work that often decides whether you successfully install doors and windows: accurate measurements, careful removal, sound flashing, proper shimming, and controlled fastening. They also cover air sealing and final operation checks. Follow the manufacturer’s instructions, and consult a qualified installer when damage, unusual framing, or uncertainty appears. A small gap can be easy to miss. I have learned that rushing the finish checks is tempting, but it can leave problems that only show up after the first hard rain or cold night. Reliable installation is rarely one dramatic trick. It is a series of patient, verifiable steps.
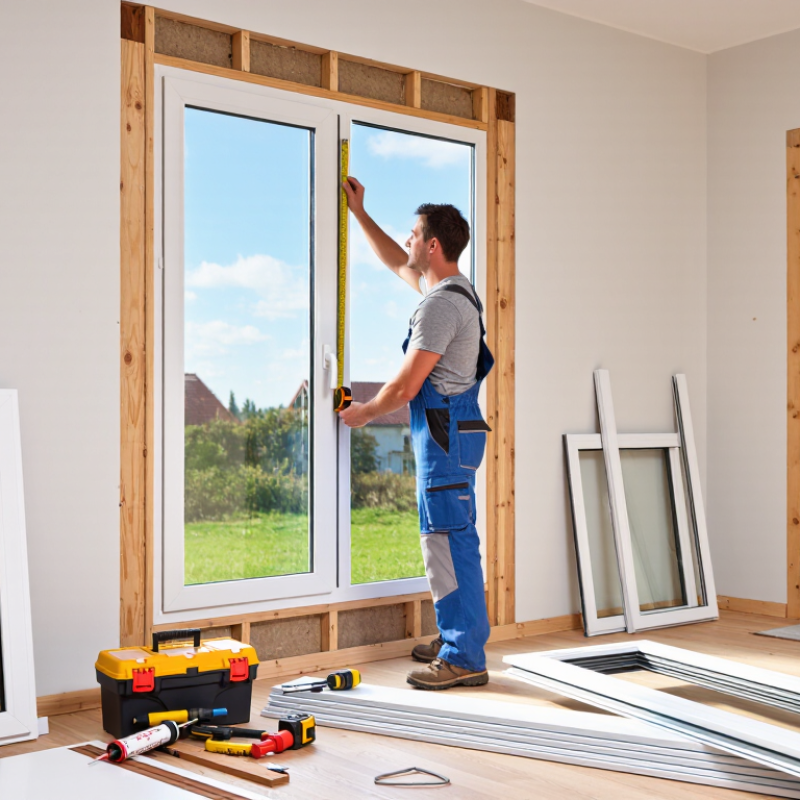
Before installing a door or window, inspect the rough opening, not just the old frame. Measure width and height at several points; older openings can be surprisingly uneven. Check that the sill is level and the sides are plumb. Look for soft wood, water stains, cracked masonry, or loose framing. A small defect can become a stubborn leak.
Tip: Wear eye protection and gloves, and keep the work area clear. Older painted surfaces may need testing before disturbance. Confirm the opening is sound before lifting a heavy unit; use a helper. Don’t guess. Check local building requirements for permits, emergency egress, safety glazing, and ventilation. Rules vary by location and room.
Dry-fit the unit and leave the manufacturer’s specified clearance for shimming and adjustment. Check the opening diagonally: unequal measurements can signal a frame that is out of square. Plan flashing and drainage so water sheds outward, not into the wall. Follow the installation instructions, and use compatible sealants. I’ve seen careful measuring still miss a bowed sill, so recheck before fastening. When structural damage or code questions arise, pause and consult a qualified professional or local building official.

7 Best Tips to Install Doors and Windows: Select NFRC-Rated Units with U-Factors Near 0.30 or Lower
When choosing doors and windows, start with the NFRC label, not the advertised glass package. The U-factor measures heat flow through the complete unit. Lower values generally indicate better insulation. A practical target is 0.30 or lower, especially in heating-dominated regions. The U.S. Department of Energy reports that windows can account for roughly 25% to 30% of household heating and cooling energy use. That makes this small number important. Check the whole-unit rating, including the frame, sash, and spacer. Glass-only performance can look impressive while the installed product performs poorly. Also compare the solar heat gain coefficient, air leakage, and visible transmittance for the local climate.
Installation details can quietly defeat a strong rating. Set the frame square, level, and plumb before fastening. A narrow, even gap should surround the unit. Use low-expansion foam designed for windows and doors, then seal the exterior with compatible flashing and sealant. Do not compress the frame. On site, a window may carry a 0.28 U-factor yet leak air because the sill was not supported correctly. The National Fenestration Rating Council explains that certified ratings help consumers compare complete fenestration products under consistent procedures. ENERGY STAR technical criteria also use U-factor and solar heat gain limits that vary by climate zone. Local code still matters. A lower U-factor is not automatically the best choice everywhere. I would recheck the orientation, shading, and installation tolerance before ordering.
| Tip | What to Do | Useful Check or Benchmark | Why It Matters |
|---|---|---|---|
| 1. Choose NFRC-rated units | Compare the NFRC label for the complete window or door assembly, not just the glass. | Look for a whole-unit U-factor near 0.30 Btu/(h·ft²·°F) or lower. Lower U-factors indicate less heat transfer. | The rated assembly provides a more useful comparison of thermal performance than center-of-glass figures alone. |
| 2. Match the glass to the climate | Review the rated solar heat gain coefficient (SHGC) alongside the U-factor before selecting glazing. | SHGC ranges from 0 to 1; a lower value admits less solar heat. The appropriate target depends on climate, orientation, shading, and design goals. | A low U-factor alone does not determine how much sun-driven heat enters a space. |
| 3. Measure the opening carefully | Measure width and height at multiple points, check both diagonals, and inspect the sill and framing for damage. | Use the unit and installation instructions to determine the required rough-opening clearance; do not assume every product uses the same clearance. | A correctly sized, sound opening helps the unit fit without being forced out of square. |
| 4. Plan for water management | Install sill and jamb flashing as part of a shingle-style drainage plane, following the product instructions and local requirements. | Confirm that laps direct water outward and that drainage paths and weep openings remain unobstructed. | Flashing helps manage water that gets behind exterior cladding and reduces the risk of concealed moisture damage. |
| 5. Set the unit level, plumb, and square | Use a level and diagonal measurements while positioning the unit; place shims where the installation instructions specify. | Recheck alignment before fastening and again after fastening. Avoid overtightening, which can distort the frame. | A distorted or misaligned frame can cause sticking, uneven gaps, or poor weather-seal contact. |
| 6. Insulate and air-seal the perimeter | Fill the space between the frame and rough opening with a compatible insulation material, then seal interior and exterior joints as directed. | Use low-expansion window-and-door foam where appropriate; keep sealant and foam away from moving parts and drainage openings. | An insulated, sealed perimeter limits drafts while preserving the unit’s operation and drainage. |
| 7. Test operation and inspect the finish | Open, close, latch, and lock each unit; inspect weatherstripping, flashing, sealant, and visible gaps before completing interior and exterior trim. | The sash or door should move smoothly, latch securely, and contact its seals evenly. Correct problems before concealing the installation perimeter. | A final functional and visual check can reveal alignment or sealing issues while they are still accessible. |
U-factor values are expressed in Btu/(h·ft²·°F). Confirm product ratings, installation details, and applicable local building requirements for the specific project.
A door or window needs room to sit correctly in its rough opening. That clearance is not wasted space. It allows adjustment, shimming, and small corrections when framing is not perfectly straight. Follow the installation instructions for the specific unit; required gaps can vary by product and material. Do not rely on a standard measurement from another project.
Measure the opening at several points, including the top, middle, and bottom. Check its width, height, and diagonals, then compare those measurements with the unit and its stated clearance. A level and a long straightedge can reveal a bowed sill or a leaning jamb. Small defects matter. If the opening is too tight, the frame may twist as it is forced into place, leaving a sash that sticks or a door that rubs. If it is too large, shims may not provide stable support.
Dry-fit the unit before fastening it. Place shims near fixing points, and keep the frame square while checking operation. Leave the specified space for insulation without packing it hard; excessive pressure can distort the frame. It is tempting to trust a quick visual check, but that is where I would slow down. Framing can look square and still be out by a few millimeters. Recheck the measurements before sealing the perimeter.
Tip: Start with a dry, clean opening. Check that the sill is level and the framing is sound before installation. A small dip can hold water against the frame. I once underestimated a shallow low spot; it took extra care to correct.
Tip: Fit a sill pan beneath the door or window, with its back dam raised and its ends sealed to the jambs. The pan should slope outward so water can drain beyond the wall. Do not block its drainage path with sealant. Follow the unit’s installation instructions, since pan details can vary.
Tip: Layer flashing from the bottom upward. Place the lower flashing first, then the side pieces over its edges, and the head flashing over the side pieces. Each upper layer should overlap the one below, like shingles, so water sheds outward. Press the flashing firmly into corners, but avoid stretching it thin. Leave the bottom edge open where the system requires drainage. It may look unfinished. That gap matters. Before covering the wall, inspect every seam and confirm the drainage route is clear. A quick water test can reveal a missed corner, though it cannot replace careful installation.
7 Best Tips to Install Doors and Windows
Accurate installation starts before the frame enters the opening. Check the rough opening for moisture, damage, and uneven surfaces. Set the sill level, then plumb both jambs with a spirit level. Keep the head level. Measure both diagonals; matching dimensions confirm a square frame. Use temporary shims near every fastener, but do not over-tighten them. A bowed jamb can make a good window perform poorly.
Seal the exterior flange with compatible flashing, then fill the interior gap with low-expansion foam. Leave drainage paths clear. Small gaps matter. The U.S. Department of Energy reports that air sealing can reduce annual energy use by 5% to 30%, depending on the building and leakage conditions. Test the installed unit under ASTM E283 procedures, using the specified pressure and calibrated equipment. The measured air leakage should remain below 0.30 CFM/ft² when that project requirement applies. Do not confuse this value with whole-building ACH50 testing. The ENERGY STAR Residential New Construction program also emphasizes manufacturer-independent installation quality and continuous air barriers. I still recheck corners after foaming; foam expansion can shift a frame. If the sash rubs, the reveal changes, or smoke moves around the perimeter, stop and correct the fit before applying final trim.
Call us one of our 3 offices across Ontario, Canada
Thanks for contacting us!
We'll get back to you as soon as possible.