Choosing the right Ceiling Panel Light is not simply a matter of matching a fixture to a ceiling opening. The panel must deliver enough usable light, distribute it evenly, and suit the room’s daily tasks. A kitchen counter needs clear, comfortable illumination; a bedroom often benefits from softer output. Measure the ceiling grid or cutout, note ceiling height, and check whether the fixture will be recessed or surface-mounted. Small details matter.
Energy performance deserves a closer look. The International Energy Agency estimates that lighting accounts for about 15% of global electricity use. The U.S. Department of Energy’s LED lighting guidance reports that LEDs use at least 75% less energy than incandescent lighting and can last up to 25 times longer. These comparisons provide useful context, but they do not guarantee that every panel is efficient or suitable. Compare lumens per watt, not just wattage, and review the manufacturer’s published test data.
Color temperature, color rendering, glare control, and dimmer compatibility also shape the result. A 4000K panel may feel crisp in a workspace, while 3000K can appear warmer in a living area. Check the color-rendering index and confirm that the driver works with the intended dimmer. No single specification tells the whole story. Room finishes, daylight, and personal comfort can change how a panel looks after installation. That part is easy to overlook. The right choice balances measured performance with the actual space, and sometimes the product sheet still leaves questions worth checking before purchase.
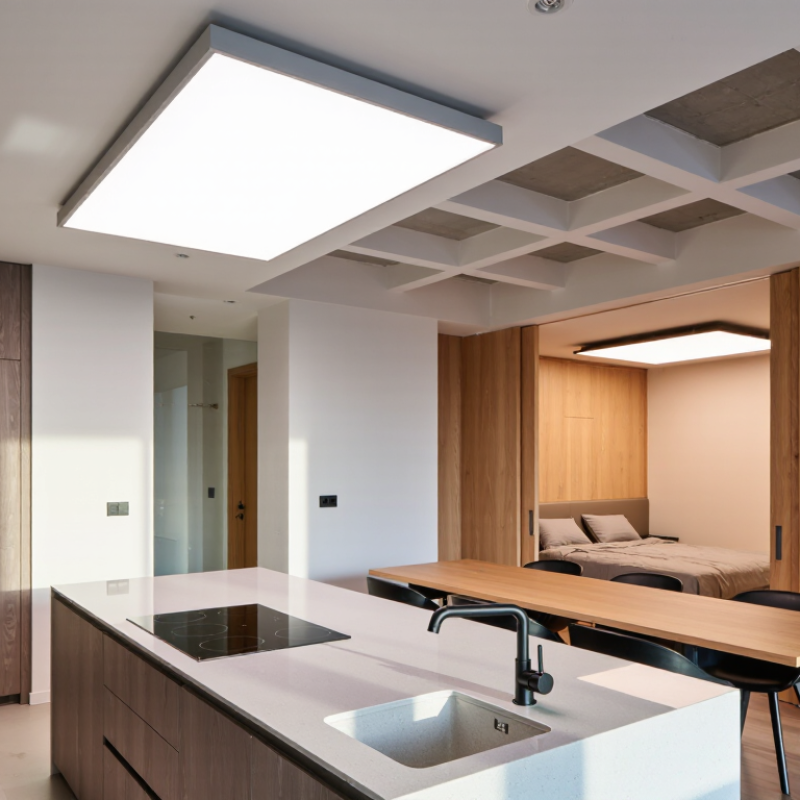
Ceiling panel lights come in recessed, surface-mounted, and suspended styles. Recessed panels sit flush with the ceiling, giving rooms a clean, quiet look. They need enough ceiling space for the housing and driver. Surface-mounted panels work where that space is limited, but their frames remain visible. Suspended panels hang below the ceiling and can suit high rooms or work areas. They may feel too prominent in a low room. Check the ceiling before choosing.
Panel construction also affects the light. Edge-lit models often use a slim profile, while backlit panels can spread light across a deeper body. Compare brightness in lumens, not watts alone. For kitchens or offices, a neutral white tone can reveal surface details without feeling too warm. A high color rendering index helps colors appear more natural. Still, specifications do not show how light will feel beside a dark wall or glossy desk.
Look for dimming compatibility, flicker performance, and a suitable ingress protection rating if the panel will be near moisture. Confirm that the dimmer and driver work together; this detail is easy to overlook. Measure the ceiling opening, then check the panel dimensions and mounting method. Small details matter. I would not choose by appearance alone, though the neatest specification sheet cannot predict every room’s glare or shadows.
Choosing a ceiling panel light starts with the room’s dimensions, but square footage is only part of the decision. A compact bedroom may need one modest panel, while a long kitchen can benefit from evenly spaced fixtures. Small rooms need restraint. An oversized panel can feel harsh, especially with pale walls that reflect more light. Measure the ceiling and note its height before comparing fixture sizes.
Room layout affects how light reaches everyday tasks. In a dining area, place the panel near the table rather than assuming the room’s center is ideal. In a kitchen, check whether cabinets or your own position will cast shadows across counters. A simple sketch can help show where light is needed. Ceiling panels with diffused output often reduce sharp shadows, though the result still depends on placement and surrounding surfaces. I have found that a layout that looks balanced on paper can feel uneven once furniture is in place.
Tips: Match brightness to the room’s use, and check the fixture’s stated light output. For reading or food preparation, avoid relying on one central panel alone. Check the shadows. If possible, test the lighting at night before settling on a final arrangement.
When comparing ceiling panel lights, separate brightness from color quality. Lumens describe total light output; lux measures light reaching a surface. The IES Lighting Handbook gives about 300 lux as a reference for general office work and 500 lux for more detailed tasks. These are starting points, not universal targets: ceiling height, room finishes, and panel spacing change the result. A bright panel can still leave a desk dim if its light spreads poorly.
Color temperature affects the room’s feel. Around 2700–3000 K appears warm, while 4000 K often feels more neutral for kitchens or work areas. Color rendering matters too. CIE Publication 13.3-1995 defines the general CRI, Ra, on a scale up to 100, calculated from eight standard color samples. For everyday interiors, CRI 80 or higher is a practical baseline; choose a higher rating where accurate colors matter. Yet CRI alone is imperfect: two panels with similar scores may render reds differently.
Tips: Check the manufacturer’s lumen, CCT, and CRI data, then compare samples in the actual room. Look at a red book cover and a wooden surface under the panel. If colors seem dull, reconsider the light—even when the specification looks impressive.
Compare brightness, color temperature, and color rendering to match the panel light to your space.
Brightness: Typical recommended illuminance is about 100–200 lux for living areas and 300–500 lux for kitchens and offices. The bars show the midpoint of each range; actual needs depend on room size, layout, and finishes.
Color temperature: Choose 2700–3000 K for a warm, relaxed feel, around 3500–4000 K for neutral white, or 5000–6500 K for a cooler appearance.
Color rendering: Look for CRI 80 or higher for general use. CRI 90 or higher is a good choice where accurate color appearance matters, such as kitchens, dressing areas, or craft spaces.
Before choosing a ceiling panel, measure the ceiling opening and the space around it. Check both the panel’s outer dimensions and its required cutout size; they are not always the same. Measure in two directions, and note any trim that could block the edges. Measure twice. Even careful measurements can be slightly off, so compare them with the fitting guide before ordering.
Check how the panel will attach to your ceiling. A recessed model needs enough cavity depth and clear space for clips or a driver. A surface-mounted model needs a compatible frame and a firm fixing point. Look for joists, pipes, or uneven plaster near the installation area. Small gaps matter. Turn off power at the circuit before work begins, and ask a qualified electrician to handle unfamiliar wiring.
Compatibility goes beyond physical fit. Confirm that the panel’s voltage and driver suit the existing supply, and check whether your dimmer supports that driver. An incompatible dimmer can cause flickering or limited brightness. Also verify connector types and the panel’s color temperature if you are matching nearby lights. Do not force a connector or trim to fit; stop and recheck the specifications if anything feels wrong.
| Check | Common Size or Requirement | Installation / Compatibility Notes | What to Verify Before Buying |
|---|---|---|---|
| Nominal 2 × 2 ft panel | Typically about 595 × 595 mm (23.4 × 23.4 in) | Often used in suspended ceilings with matching 2 × 2 ft grid openings. Some models support surface or suspended mounting with separate accessories. | Measure the actual grid opening and check the panel’s overall dimensions. Nominal size does not guarantee an exact fit. |
| Nominal 2 × 4 ft panel | Typically about 595 × 1,195 mm (23.4 × 47.0 in) | Common in suspended ceilings designed for 2 × 4 ft fixtures. A different mounting kit may be needed for surface or suspended installation. | Confirm the ceiling grid layout, panel depth, and available clearance above the ceiling. |
| Nominal 1 × 4 ft panel | Typically about 295 × 1,195 mm (11.6 × 47.0 in) | Designed for compatible 1 × 4 ft openings or for installation using a model-specific mounting frame. | Check the opening width carefully; 1 × 4 ft and 2 × 4 ft panels are not interchangeable. |
| Recessed installation | Requires a compatible ceiling grid or a correctly sized cutout and frame | Most suitable for suspended ceilings when the panel is designed for the grid type. Recessing into a solid ceiling may require a compatible frame and adequate support. | Compare the fixture’s body dimensions with the opening, grid type, and space available above the ceiling. |
| Surface-mounted installation | Uses a surface-mount frame or kit compatible with the exact panel model | Useful for solid ceilings where a recessed grid is unavailable. The mounting surface must be flat and strong enough to support the fixture. | Confirm that the frame is included or available, and check the required ceiling anchors and installation depth. |
| Suspended installation | Uses suspension cables or a hanging kit specified for the fixture | Can lower the panel below a high ceiling. Suspension hardware and attachment points must be suitable for the fixture’s weight. | Check whether the suspension kit is included, the permitted hanging length, and the required ceiling fixing points. |
| Electrical supply | Many commercial LED panels are available with drivers rated for 120–277 V AC; ratings vary by model | The panel’s driver must match the building supply. Electrical installation should follow local codes and be performed by a qualified person where required. | Read the driver label for input voltage, frequency, wiring requirements, and any grounding instructions. |
| Dimming compatibility | Depends on the driver; options may include non-dimmable, 0–10 V, or phase-dimming models | A dimmable panel must be paired with a compatible dimmer and control wiring. Dimming methods are not automatically interchangeable. | Match the dimmer type to the driver specifications and check the stated dimming range. |
| Ceiling clearance and obstacles | Clearance requirements depend on fixture depth, driver location, and mounting method | Joists, ductwork, insulation, and other services can prevent a panel from fitting or being installed safely. | Measure the available plenum depth and check the installation instructions for clearance and access requirements. |
Important: Dimensions and electrical ratings shown are common examples, not universal specifications. Always confirm the exact fixture dimensions, mounting method, driver rating, and installation requirements in the product documentation before purchase.
How to Choose the Right Ceiling Panel Light?
Compare energy use by looking at both wattage and light output. A panel with more lumens per watt can provide useful brightness while drawing less electricity. Check the room’s needs, too: a kitchen work area may need brighter, more even light than a hallway. Dimming can help reduce energy use, but only when the panel and dimmer are compatible. Small details matter.
Durability depends on more than the panel’s outer frame. Check the rated service life, driver quality, warranty, and operating temperature range. Heat trapped above a ceiling can shorten component life, even when the light looks sturdy. For bathrooms or other damp areas, verify that the product’s protection rating suits the location. Look for applicable safety certification and confirm it meets local requirements. A low price can be tempting, but replacement work is inconvenient and adds waste.
Tips: Before buying, measure the ceiling opening and note nearby insulation or ventilation. Read the installation instructions, especially for clearances and wiring. If the label is unclear, ask a qualified electrician rather than guessing. I’d also compare the stated brightness with the light you already use; specifications can feel abstract until you see them in your room.
Call us one of our 3 offices across Ontario, Canada
Thanks for contacting us!
We'll get back to you as soon as possible.